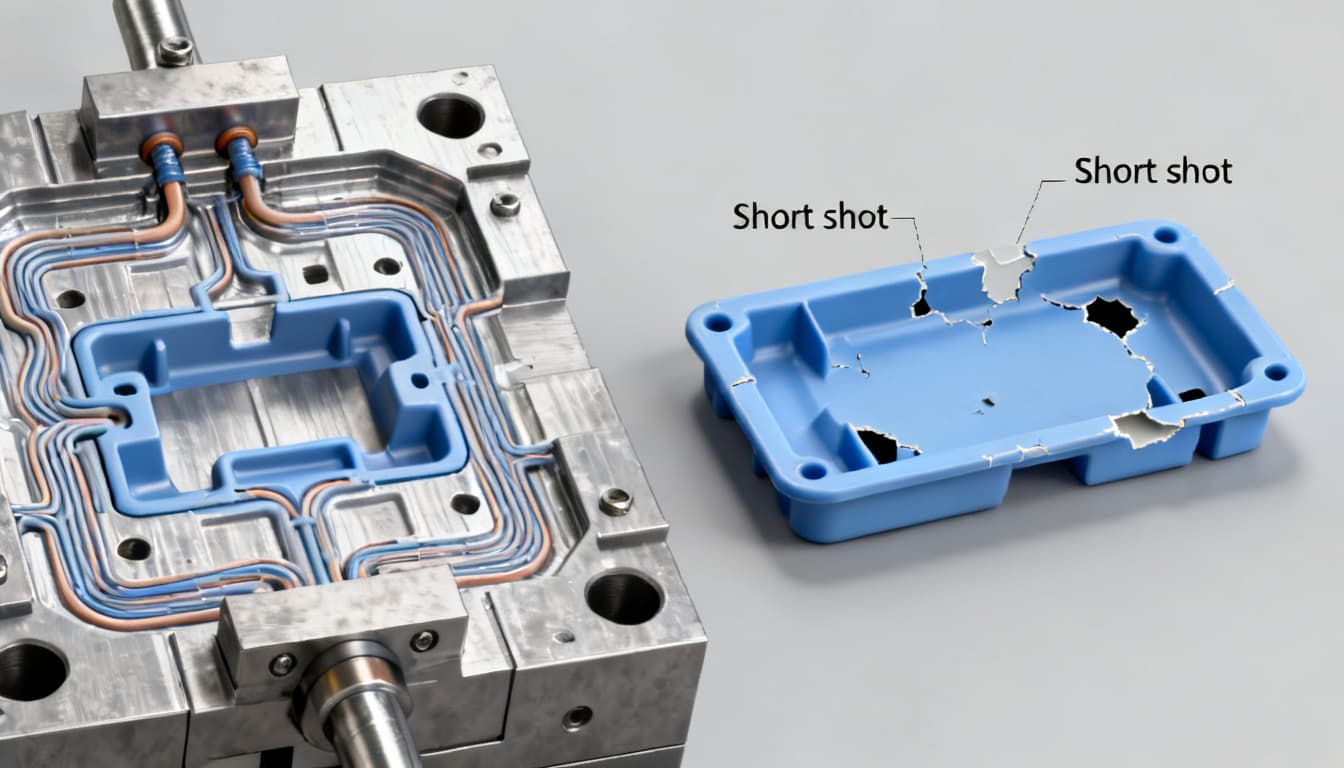
Troubleshooting Short Shot Defects: Data-Backed Process Adjustments for Consistent Fill
A single short shot on a multi-cavity tool can cascade into a shift’s worth of scrap, missed shipment deadlines, and a customer-requested corrective action report. In high-volume injection molding, incomplete filling is rarely a one-off event—it’s a signal that the process has drifted outside its ca
Short Shot Defects: Data-Backed Process Adjustments to Achieve Consistent Fill
When a Short Shot Isn’t Just a Fill Issue: The Hidden Costs of Inconsistent Molding
A single short shot on a multi-cavity tool can cascade into a shift’s worth of scrap, missed shipment deadlines, and a customer-requested corrective action report. In high-volume injection molding, incomplete filling is rarely a one-off event—it’s a signal that the process has drifted outside its capable window. When that signal is ignored, the consequences move from a few rejected parts to a systemic quality failure.
Consider a real-world case documented by Qualityze: a manufacturer kept fighting intermittent short shots on a housing component. Operators repeatedly adjusted a tooling fixture to compensate, but the root cause—a design validation flaw in the fixture itself—was never identified. The unresolved problem eventually caused a full batch of nonconforming parts to ship, triggering a costly containment and rework effort (Qualityze case study). The short shot was merely the visible symptom; the disease was a process that lacked the data feedback loops to catch the drift before it became a defect.
This pattern mirrors what the DCMA’s discrepancy processing manual calls “nonconforming supplies”—materials or parts that deviate from specified requirements and must be controlled through documented corrective action (DCMA MAN 2301-06). Short shots, by definition, are nonconformances. When they recur, the organization is effectively shipping latent defects until the root cause is eliminated.
Interestingly, many short shot outbreaks follow a process change—a well-intentioned parameter tweak that inadvertently narrows the fill window. This is the injection molding equivalent of a deploy-induced regression in software: a modification that passes a limited validation but fails under production variation. The StackGen team’s analysis of failure modes found that the single biggest improvement in mean time to recovery came from adopting a “rollback first, debug later” discipline (StackGen, Deploy-Induced Regression). In molding, that means reverting to the last known-good process recipe before chasing ghosts. When quality standards are integrated into every step, defects are caught earlier—often before they leave the machine—and root causes are addressed faster (Tractian, Quality Management Process). The rest of this article lays out a data-backed sequence to do exactly that for short shots.
The Physics Behind a Short Shot: Flow Front Freeze-Off and Pressure Loss
A short shot occurs when the molten plastic stops flowing before the cavity is completely filled. The underlying physics is straightforward: the flow front loses so much heat and pressure that it solidifies prematurely, or the available injection pressure is insufficient to push the melt through the remaining flow path. In either case, the cavity pressure never reaches the level required to pack the part.
What makes troubleshooting tricky is that the same visual defect—an incomplete part—can stem from multiple root causes, each with a distinct pressure signature. Cavity pressure sensors, when sampled at high frequency, reveal these signatures. A gradual decline in peak pressure over consecutive shots points to a thermal or viscosity shift; a sharp pressure drop right at the gate suggests gate freeze-off or a blocked gate. Westec Plastics emphasizes that in-process automation and real-time data capture allow continuous monitoring for minute variations that could lead to short shots long before they affect the final product (Westec Plastics).
The table below maps common short shot root causes to their typical cavity pressure signatures and the first-line process adjustments recommended by Aprios (Aprios, Short Shots).
| Root Cause | Pressure Signature | Typical Remedy | Data Indicator |
|---|---|---|---|
| Low melt temperature | Peak pressure drops gradually over multiple shots; flow front freezes early in thin sections | Increase barrel temperature in the rear and middle zones; verify melt temperature with a probe | Melt temperature trending below material supplier’s recommended range |
| Inadequate venting | Pressure spikes at the end of fill, then drops abruptly; burn marks may appear | Clean or deepen vents; add vacuum venting if needed | Pressure at vent location exceeds 10–15% of injection pressure |
| Restricted gate or runner | Sharp pressure drop at the gate with little pressure rise in the cavity; short shot near the gate | Increase gate size or modify runner diameter; verify no cold slug blocking the gate | Pressure transducer at gate shows high pressure, cavity transducer shows low pressure |
| Insufficient injection speed | Pressure rises slowly; flow front cools before reaching end of cavity | Increase injection velocity; profile speed to fill thin sections quickly | Fill time exceeds 80% of the predicted freeze time |
| Low holding pressure / short hold time | Peak cavity pressure is reached but decays rapidly; sink marks accompany short shots | Increase holding pressure and extend hold time until gate freeze | Pressure at gate-seal time is below 50% of peak |
| Check ring wear | Inconsistent peak pressure shot-to-shot; screw position at transfer varies | Inspect and replace check ring; monitor cushion consistency | Cushion variation > 0.5 mm |
Each of these signatures is detectable with a cavity pressure sensor and a data acquisition system that logs at least 500 Hz. The key is to move from reactive “increase pressure” adjustments to targeted corrections based on what the pressure curve is actually telling you.
Machine Parameter Tweaks vs. Mold Modifications: Which Fix Delivers Faster ROI?
When a short shot appears, the immediate question is whether to adjust the process or cut steel. Both paths can work, but they carry very different cost, lead time, and risk profiles. Thogus notes that optimizing injection speed and balancing the cycle time—including the cooling phase—are critical to preventing short shots, and that machine parameters such as back pressure and screw speed must be set correctly (Thogus). On the other hand, Aprios warns that a poorly designed runner system hinders the mold from filling correctly and efficiently, which can interrupt the process and lead to inconsistent part quality (Aprios).
The decision hinges on whether the current process window is wide enough to absorb normal material and machine variation. If you can achieve consistent fill by moving parameters well within their allowable limits, a process tweak is faster and cheaper. If you’re already pushing injection pressure to 95% of the machine’s maximum or melt temperature to the resin’s degradation threshold, the mold needs rework.
| Comparison Metric | Process Parameter Tweak | Mold Modification | Selection Criteria & Failure Boundary |
|---|---|---|---|
| Typical lead time | Minutes to hours (on the press) | Days to weeks (tool room + validation) | Choose process tweak if downtime cost exceeds tool rework cost over 1 year |
| Cost | Negligible (labor only) | $2,000–$15,000+ depending on gate/runner changes | If scrap cost from narrow window exceeds rework cost in 6 months, modify mold |
| Effectiveness for narrow process window | Low—may shift the problem to another cavity or material lot | High—permanently widens the processing window | If CpK for fill balance < 1.0, mold modification is usually required |
| Skill required | Process technician with pressure curve interpretation skills | Mold designer + mold flow analyst | Process tweak is reversible; mold modification is not—validate with simulation first |
| Long-term stability | Susceptible to drift with material viscosity changes | Robust across normal variation | If short shots reappear with each new resin lot, the mold is the root cause |
| Example scenario | Intermittent short shot in one cavity due to back pressure set too low for semi-crystalline resin (Hordrt) | Consistent short shot in the same cavity across all parameter combinations; runner diameter undersized | Perform a design of experiments (DOE) first; if no parameter combination fills the cavity, modify the mold |
In practice, many shops start with process tweaks because they’re fast and reversible. But if you find yourself adjusting parameters every shift to keep the mold running, the ROI calculation flips quickly. A one-time mold modification that eliminates the adjustment labor and scrap often pays for itself within a few production runs.
A Data-Backed Adjustment Sequence: From Pressure Curves to Consistent Fill
Rather than randomly increasing injection pressure or speed, a structured, data-driven sequence turns short shot troubleshooting into a repeatable engineering exercise. The goal is to use cavity pressure monitoring to identify the exact point of fill imbalance, then adjust the injection velocity profile and holding phase based on real-time data—not guesswork.
Hordrt describes a scenario where a customer experienced inconsistent filling in a 4‑cavity mold for a small consumer electronics housing. One cavity consistently produced short shots while the other three filled completely. Mold flow analysis revealed that the runner system was unbalanced, causing the problem cavity to receive less melt. The solution involved rebalancing the melt delivery by adjusting gate dimensions and, in the short term, profiling the injection speed to push more material into the starved cavity (Hordrt, Short Shot Defects). Westec’s approach of using in-process automation for immediate adjustments aligns perfectly with this methodology: instead of reacting to scrap, you prevent issues from forming by continuously monitoring cavity pressure and automatically adjusting hold pressure or velocity (Westec Plastics).
The following sequence has been proven across hundreds of mold qualifications at PandaMolding. It assumes you have at least one cavity pressure sensor per cavity and a data acquisition system capable of overlaying pressure curves.
| Step | Parameter Monitored | Target Value / Change | Expected Outcome |
|---|---|---|---|
| 1. Establish baseline | Cavity pressure curves for all cavities at known-good settings | Peak pressure within ±5% across cavities; fill time < 80% of freeze time | Reference signature for comparison |
| 2. Identify fill imbalance | Time to reach 50% of peak pressure in each cavity | Difference < 0.05 s between cavities | Pinpoints which cavity is lagging |
| 3. Profile injection velocity | Injection speed (mm/s) vs. screw position | Increase speed during thin section filling; reduce before end of fill to avoid flash | Flow front reaches all cavities before freeze-off |
| 4. Adjust holding pressure | Holding pressure (bar) and time (s) | Set holding pressure to 50–70% of injection pressure; hold until gate seal | Eliminates sink and completes fill in starved cavity |
| 5. Tune back pressure | Back pressure (bar) and screw recovery time | Increase back pressure until melt density stabilizes; monitor melt temperature | Homogeneous melt, consistent shot size |
| 6. Verify with real-time monitoring | Peak cavity pressure trend over 50 shots | CpK > 1.33 for peak pressure; no declining trend | Process is capable and stable |
After implementing this sequence, the 4‑cavity mold mentioned earlier achieved a fill balance within 3% peak pressure variation, and the intermittent short shot disappeared. The key takeaway: let the pressure curves dictate which parameter to adjust, and always verify that the adjustment widens the process window—not just fixes one shot.
Short Shot Troubleshooting: What Senior Engineers Ask Before Adjusting Parameters
Experienced process engineers don’t jump to turn knobs. They ask a series of diagnostic questions that isolate the failure mode. Below are the most common questions, along with answers grounded in cavity pressure data and mold flow analysis.
Q: How do I quickly determine if a short shot is caused by insufficient injection pressure or a blocked gate?
Check the cavity pressure curve. A blocked gate shows a sharp pressure drop at the gate with no further rise in the cavity, while low injection pressure results in a gradual, lower peak across the entire fill phase. A short shot near the gate often points to gate freeze-off; a short shot at the end of fill suggests pressure-limited flow. If the pressure at the gate transducer is high but the cavity transducer barely registers, the gate is the restriction.
Q: What process data should I capture to diagnose intermittent short shots?
Record cavity pressure profiles, injection velocity, screw position at transfer, and melt temperature for every shot. Intermittent defects often correlate with fluctuations in melt viscosity, check ring wear, or inconsistent back pressure recovery. Use high-resolution data logging (at least 500 Hz) to catch transient events. A LinkedIn troubleshooting discussion on short shot defects highlights that many intermittent issues trace back to a worn check ring that allows melt to leak backward during injection (LinkedIn, Injection Molding Troubleshooting).
Q: Can mold flow analysis reliably predict short shots before cutting steel?
Yes, modern mold flow simulations can predict short shots by modeling flow front advancement and freeze-off under varying process conditions. They allow virtual testing of gate placement, runner sizing, and material behavior, reducing trial runs. Hordrt confirms that mold flow analysis can predict short shot problems before the mold is built (Hordrt). However, simulations must be validated with actual material data and machine capability curves; otherwise, they can underestimate pressure drop in thin walls.
Q: When is it more cost-effective to modify the mold rather than tweak process parameters?
Modify the mold when the process window is too narrow to accommodate normal variation—e.g., a severely undersized gate or unbalanced runner that forces extreme pressures. If process adjustments can consistently fill the cavity without pushing parameters near limits, mold modification is usually unnecessary. A practical rule: if you need more than a 10% increase in injection pressure above the original process setup to fill the cavity, the mold likely needs attention.
Q: How does back pressure adjustment influence short shot occurrence in semi-crystalline vs. amorphous resins?
In semi-crystalline resins, higher back pressure improves melt homogeneity and can prevent unmelted pellets that cause flow restrictions. For amorphous resins, excessive back pressure may overheat the melt and degrade material, leading to inconsistent viscosity and short shots. The optimal back pressure must be tuned per material’s thermal sensitivity. Hordrt recommends adjusting back pressure to improve melt homogeneity, but always monitoring melt temperature to avoid degradation (Hordrt).
Q: What are the early warning signs in cavity pressure curves that a short shot is imminent?
A declining peak cavity pressure trend over consecutive shots, a shift in the pressure drop at transfer, or an increase in the time to reach peak pressure all signal that the melt is losing its ability to fill the cavity. Monitoring these trends enables proactive adjustment before a short shot occurs. Set control limits on peak pressure and fill time; when three consecutive shots trend downward, trigger an alert to check material feed, melt temperature, or check ring condition.
Short shots don’t have to be a recurring firefight. By combining cavity pressure data with a disciplined adjustment sequence, you can turn an inconsistent fill into a capable, stable process. The next time a short shot appears, resist the urge to simply “bump the pressure.” Instead, read the pressure curve, identify the root cause, and apply the targeted fix that widens your process window for the long haul.
For help diagnosing persistent short shot issues or to review your mold design for fill balance, get in touch with our engineering team.
References & Further Reading
- Case Studies of QMS Failures and Recovery – Qualityze
- DCMA Manual 2301-06, Discrepancy Processing
- Deploy-Induced Regression: The Most Common Incident Your Team Is Causing Itself – StackGen
- Quality Management Process: Principles & Best Practices – Tractian
- Injection Molding Defects: Causes and Remedies – Westec Plastics
- Short Shots – Why They Happen and How to Solve Them – Aprios
- Short Shot in Injection Molding: Causes and Prevention Measures – Thogus
- Short Shot Defects in Injection Molding: Causes & Detection – Hordrt
- Injection Molding Troubleshooting: Short Shot Defects – LinkedIn